
Beacon Placement Guide
Where a beacon sits in a physical space determines whether the system works at all. Two identical beacons, configured identically, will behave differently depending on what is around them. Walls, shelving, ceiling tiles, metal fixtures and the movement of people all alter the radio signal between the beacon and the receiving device. Placement is not a secondary concern to be sorted out after procurement; it is the point at which a deployment succeeds or fails.
Effective placement starts from the operational objective rather than the technology. Before deciding where a beacon goes, define what should happen when a device detects it: a zone entry, a proximity trigger to a specific exhibit, a handoff between navigation zones, or a dwell-time measurement. Each of these intentions implies a different physical arrangement and a different tolerance for signal imprecision.
A practical placement process follows a predictable sequence. Map the space and mark the zones the system needs to recognise. Walk the floor with a beacon and a receiving device to observe raw signal behaviour in that specific environment. Adjust positions based on what the measurements show, not what a floor plan suggests. Document every final position so that maintenance staff can find and replace units without retracing the entire exercise.
Height, Orientation and Line of Sight
Bluetooth Low Energy signals at 2.4 GHz do not behave like visible light, but they are far from omnidirectional in practice. The antenna pattern inside a typical beacon housing is not perfectly spherical. Mounting height and orientation change which parts of a room receive a usable signal and at what strength.
Ceiling mounting
Ceiling mounting is the most common default, and for good reason: it keeps beacons out of reach, reduces the chance of physical tampering and provides a relatively clear path to devices carried at torso or pocket height. However, ceiling height matters. A beacon at 2.5 metres in a retail unit with low racking behaves differently from one at 8 metres beneath a warehouse roof. At greater heights, the signal reaches the floor at a wider angle and passes through more air, which slightly reduces observed signal strength at the receiver. The practical effect is that the same beacon, at the same transmit power, will appear weaker to a phone on the floor of a high-ceilinged space than in a low one.
Wall mounting
Wall mounting is useful when the objective is to define a boundary rather than cover an area. A beacon on a wall beside a doorway can mark a transition between zones. The limitation is that the signal pattern radiates outward from the wall, creating a half-sphere rather than a full one. If the wall is load-bearing or contains metal reinforcement, signal attenuation behind the beacon can be severe, which is generally acceptable if the target zone is in front of it but problematic if the system relies on detection from both sides.
Orientation
Beacon housings are not always symmetrical. If the internal antenna sits closer to one face of the enclosure, rotating the beacon on its mounting point changes which direction the strongest signal travels. Manufacturer documentation sometimes specifies a preferred orientation, but in many cases the only reliable method is to test. Rotate a beacon through 90-degree increments at the proposed position and observe whether the received signal strength changes at the points where detection matters.
Line of sight
Bluetooth can pass through some obstructions, but every material between beacon and receiver reduces signal strength and introduces variability. Glass is relatively transparent at 2.4 GHz. Plasterboard and wood attenuate the signal moderately. Metal reflects or absorbs it heavily. A beacon placed directly behind a metal-framed promotional stand may be undetectable only a few metres away on the other side. Line of sight does not need to be perfectly clear, but the path should be free of large metal objects and dense materials wherever possible.
Placement in Retail Environments
Retail spaces present a specific set of placement challenges: dense metal shelving, frequent layout changes, varying customer density and the need for triggers that feel relevant rather than intrusive.
Entrance zones are the most common starting point. A beacon near the door can detect when a known customer enters and trigger a greeting or a personalised offer. The practical difficulty is distinguishing between someone walking in and someone walking past the shopfront. Placing the beacon slightly inside the doorway, angled toward the interior, reduces false triggers from the street. A second beacon further inside creates a two-point entry confirmation that is more reliable than a single detection.
End-cap displays and promotional fixtures are natural locations for proximity triggers. The beacon should be mounted on or very close to the fixture itself, not on a distant ceiling, because the whole point is to associate the notification with the product the customer is standing beside. A small beacon adhered to the top edge of the display, facing downward, often works well. Check that the fixture is not made of metal mesh or thick steel, which would block the signal entirely.
Queue areas benefit from beacons placed to measure dwell time rather than to push notifications. A beacon above a queue position, combined with one at the till point, allows the system to estimate wait length. The placement challenge here is that queues move and people stand at varying distances from the beacon. Mounting directly above the expected queue path, at a height that keeps the signal relatively consistent across a 1.5-metre horizontal band, gives the most stable readings.
Fitting rooms require careful thought. A beacon inside or just outside a fitting room can trigger product suggestions or allow staff to bring alternative sizes. The confined space amplifies signal strength, so transmit power should be reduced to avoid the beacon being detected in adjacent cubicles. Wall mounting at roughly head height, on the partition between rooms, is a common approach, but each fitting room layout demands its own test.
Placement in Museums and Galleries
Museum placement is constrained by conservation requirements, visitor experience expectations and the need for precise association between a signal and a specific exhibit.
The primary rule in museums is that the beacon must be close enough to the exhibit that the system can confidently associate a detection with that object, not a neighbouring one. In a gallery where exhibits are spaced several metres apart, a ceiling-mounted beacon directly above each piece usually suffices. In dense displays or cabinet-style arrangements where items are close together, ceiling mounting may create too much overlap. In those cases, low-level placement on the cabinet itself, or on the plinth beneath an object, provides tighter spatial association.
Visual intrusion is a genuine concern. Curators will resist visible technology bolted to historic interiors or minimalist gallery walls. Low-profile beacons that resemble smoke detectors are generally acceptable on ceilings. For exhibit-level placement, small beacons hidden inside or beneath display furniture work, provided the furniture material does not block the signal. A beacon inside a wooden display case, for instance, may transmit through the wood but at a significantly reduced range that must be tested.
Multi-floor museums introduce zone-boundary questions. A beacon on the first floor may be detected on the ground floor directly below, depending on ceiling construction. Concrete floors with metal reinforcement provide good isolation. Open mezzanines or timber floors allow significant signal leakage. Where floor penetration is a problem, zone logic in the receiving software can help, but the most robust solution is physical: place beacons far enough from floor edges that downward leakage does not create ambiguous detections.
Placement in Warehouses and Industrial Settings
Warehouses are radio-hostile environments. Racking is typically steel, the floor is often concrete with metal reinforcement, and forklifts, pallets and stock create a constantly shifting landscape of metal obstructions. Beacon placement here demands more testing and less reliance on theoretical coverage.
Aisle-level placement is usually necessary. A ceiling-mounted beacon in a warehouse with 10-metre-high racking will struggle to reach the floor of a narrow aisle flanked by steel on both sides. Mounting beacons on the racking uprights at roughly 2 to 3 metres above floor level puts the signal closer to the devices that need to detect it, typically handheld scanners or phones carried by pickers. The racking itself becomes both a mounting surface and a source of interference, so the beacon should face into the aisle rather than into the rack.
Dock doors and zone boundaries are critical transition points. A beacon on each side of a loading bay door can mark the boundary between internal and external zones, which matters for tracking asset movement. The challenge is that dock doors are large, often open, and subject to temperature extremes that affect battery performance. Beacons near dock doors should be rated for the temperature range they will experience and checked more frequently than interior units.
High-bay storage areas may require more beacons per square metre than an open-plan office, simply because each beacon's effective range is reduced by the surrounding metal. Expect to test multiple positions per aisle and accept that the result will be a patchwork of small coverage cells rather than broad zones.
Placement in Event Venues
Event deployments differ from permanent installations in three ways: the infrastructure is temporary, the environment changes rapidly during build-up and breakdown, and crowd density fluctuates enormously between quiet periods and peak traffic.
Temporary mounting is the first practical question. Cable ties to trussing, Gaffer tape to smooth surfaces, and magnetic mounts on steel structures are all common. The priority is that the beacon stays where it is put for the duration of the event and can be removed without damage to the venue. Avoid placing beacons where they will be bumped by equipment during build-up or struck by overhead rigging.
Registration and entry points follow similar logic to retail entrances but with higher throughput. A beacon at each entry gate can log arrivals, but the density of devices in a queue means the system will see many detections in quick succession. Placement should focus on reliable zone entry detection rather than trying to count individuals, since Bluetooth detection is not a reliable people-counting method in dense crowds.
Session rooms and seminar spaces need beacons that define the room boundary clearly. One beacon per room is the minimum, but two or three provide more reliable detection and help the system distinguish between someone standing in the doorway and someone seated inside. Mount on the wall near the entrance or on a lectern, and test with the room both empty and partially filled, since bodies absorb 2.4 GHz signals and change the detection pattern.
Exhibition floors are the most complex event environment. Stands are built from varied materials, some metal-clad, some fabric. Beacons mounted on stands may work well on one stand and fail on the next. A practical approach is to place beacons on the venue's own infrastructure, such as ceiling grids or pillar-mounted positions, rather than on exhibitor stands that you do not control. This makes the placement predictable and removes the risk of an exhibitor moving or covering a beacon during the event.
Common Beacon Placement Mistakes
The most frequent placement error is assuming that a beacon's advertised range translates directly to reliable detection distance in a real space. A beacon rated for 70 metres in open air may only be consistently detected at 15 metres in a furnished retail unit. Placing beacons based on open-air specifications leads to gaps in coverage and zones that do not trigger as expected.
Mounting directly on or behind large metal surfaces is another routine mistake. A beacon stuck to the back of a metal door, inside a metal cabinet, or beneath a metal shelf will either be undetectable or will produce a highly erratic signal. If a metal surface is unavoidable, offset the beacon by at least 30 centimetres using a non-metallic spacer or bracket, and test whether the signal reaches the intended detection area.
Placing beacons too close together causes a different class of problem. When a receiving device can see three or four beacons at similar signal strengths, the system must decide which one represents the user's actual position. That decision is never perfect, and in a zone-trigger scenario it can result in the wrong notification being shown. As a rough starting point, separate beacons by at least the distance at which you want zones to be distinct, then verify with live testing.
Failing to account for seasonal or operational changes catches out permanent deployments. A retail space that works well in summer may behave differently in winter when promotional displays, additional stock and heavier clothing on customers all alter the radio environment. A warehouse aisle that tests clearly when empty may perform differently when fully racked. Placement should be verified under representative conditions, not just during an empty-site walk-through.
Neglecting documentation means that every subsequent maintenance visit or layout change requires starting from scratch. Recording each beacon's physical position, mounting method, height, orientation and the zone it serves allows someone else to replace a failed unit correctly. Without that record, a battery replacement can silently move a beacon to the wrong position, and the system will appear to malfunction when in fact the hardware is working but in the wrong place.
Consolidate placement decisions into one controlled plan
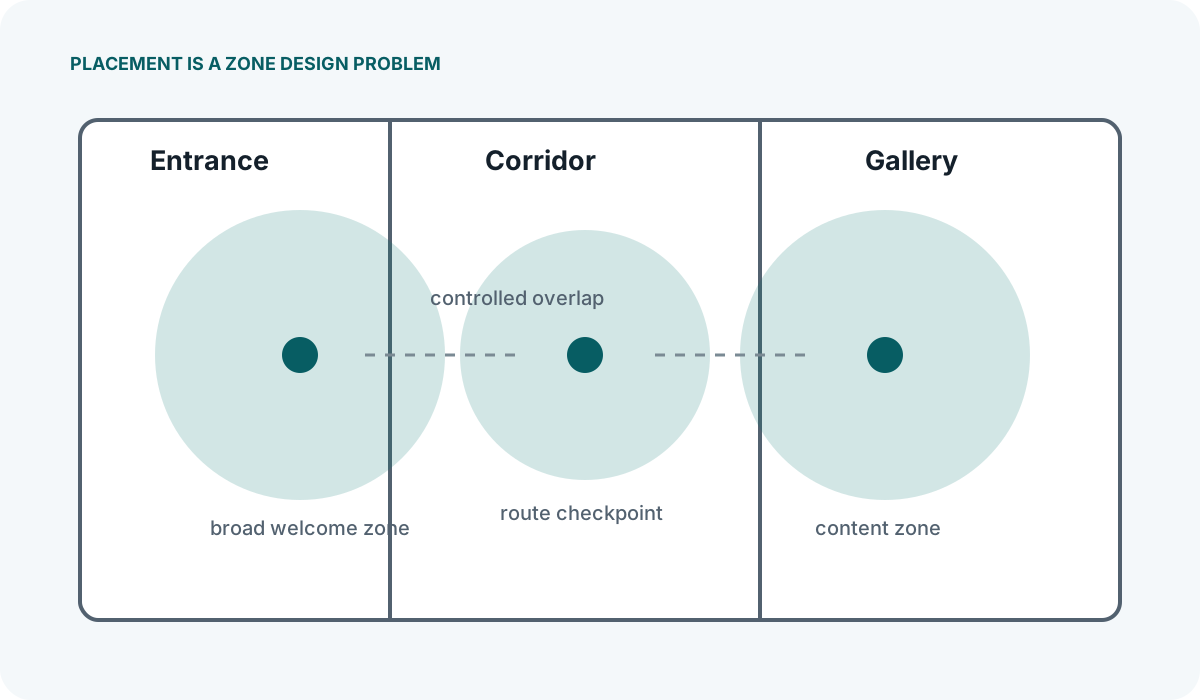
A placement guide should produce an installable plan, not a generic spacing rule. Record the purpose of each beacon, mounting surface, height, orientation, nearby obstructions, power assumptions, identifier and acceptance test. Where two drafts recommend different positions, resolve the difference with measured visitor-path tests rather than adding more beacons by default.


